 A washing machine has long been a rarity and is a must-have attribute of every home.
Its breakdown is always a nuisance, so there is a desire to quickly return the washing unit to work.
The tank of the washing machine is its main and main part.
In this article, we will look at how to fix the problem associated with the washing machine tank.
What is a washing machine tank
It is in the tank that the moving parts of the washing equipment and the drum are located, including.
 The tank carries out washing of linen, despite the fact that it directly interacts only with the walls of the drum.
It is in the tank that water enters and it seems that such a durable, but at the same time seemingly non-performing mechanism cannot break.
However, in the tank there is something to fail. Repairing the washing machine tank is a rather time-consuming job, and in order not to redo it, you will have to work hard.
If you need to get to the heart of the washing machine, you will have to disassemble it completely, then take out the tank and disassemble it too. The last stage of work after the repair of the washing machine tank – This is assembly in reverse order.
Tank types
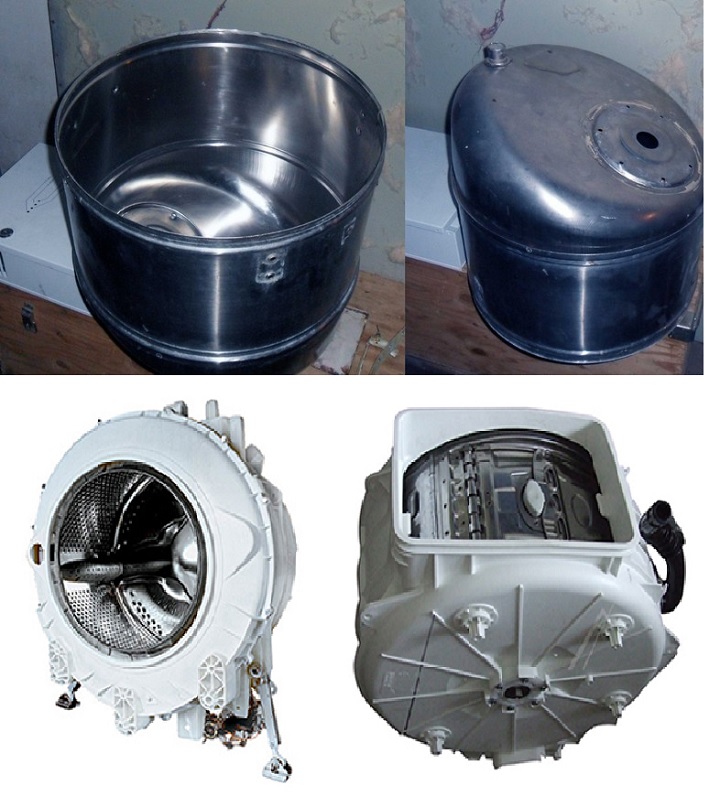 Tanks can be made from:
- enameled
- stainless steel and
- plastic.
Today, meeting an enameled tank is a rarity.
A stainless tank is reliable and can last for decades, but its production is quite expensive. Therefore, this type is found in expensive models.
A plastic tank is found in most modern washing machines. They are made simply, weigh little, heat water quickly.
Tank malfunctions
What can go wrong in a tank?
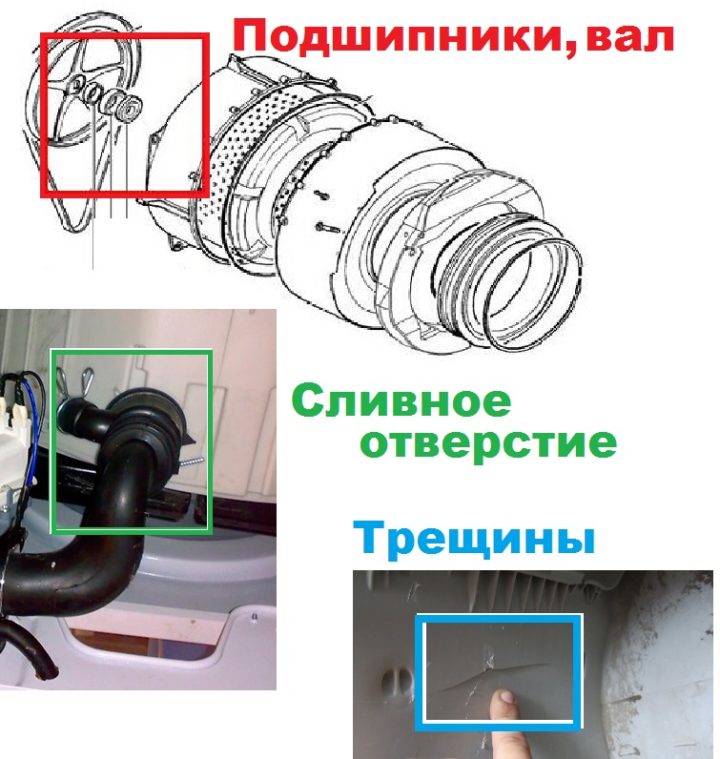 Bearings. A very inexpensive part, but it will take a lot of effort and time to replace it, risking serious damage to the shaft, pin and other parts. Bearings are located in the tank and are movable elements.
- Drain hole at the tank. Rather, the drain valve, which usually breaks or becomes clogged and needs to be cleaned.
- Shaft. Usually a shaft problem is the result of an unrepaired bearing failure.
- Tank walls. Also, the consequences of improper operation of bearings and shock absorbers, which lead to deformation of the tank walls under the influence of the centrifugal force of the drum.
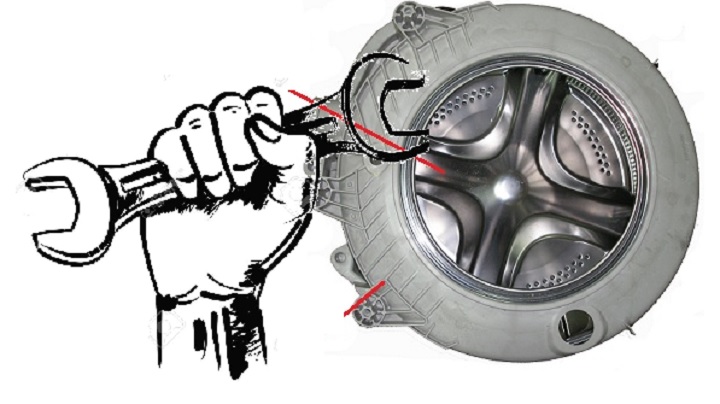
How to disassemble the tank
Depending on the model of the washing machine, the tank can be:
- non-separable,
- collapsible.
Dismantling the tank requires a careful and painstaking approach.
Non-separable tank repair
Disassembly
Repairing a non-separable washing machine tank is much more difficult.
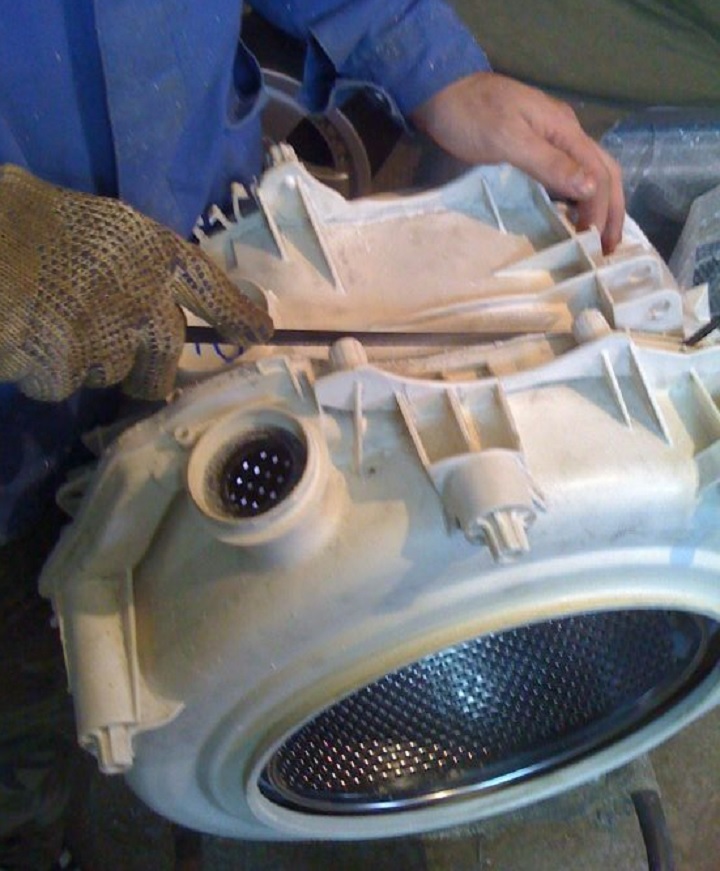 Before proceeding with the analysis of the part, you need to inspect the case from all sides and find the place of the soldered seam. It will be needed to drill holes for fasteners for reassembly of the part.
- Armed with a drill and a thin drill, you need to drill 15-20 holes in a circle along the seam.
- Next, this seam must be sawn to get inside the tank. This is done with a hacksaw. It takes a lot of time, it takes patience. The maximum deepening when sawing the tank should not be more than 5 cm, otherwise irreparable damage to the walls of the tank can be caused.
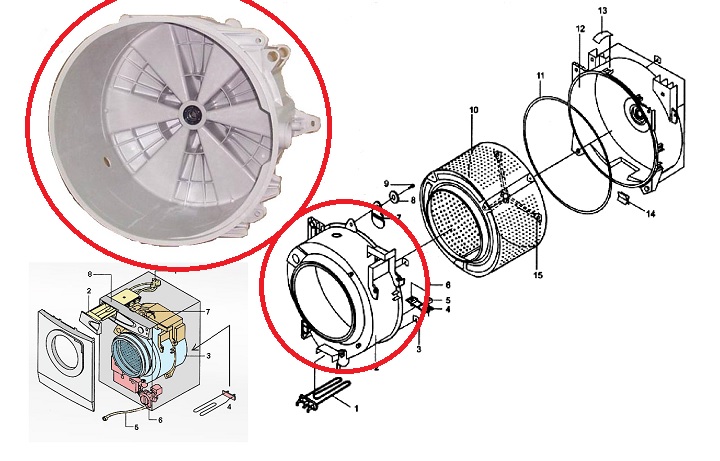
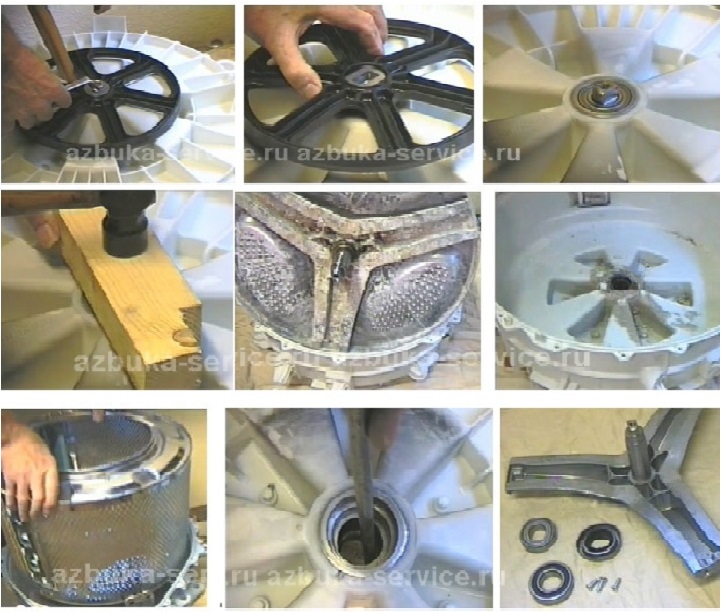 After this stage, the non-separable tank became collapsible and consists of two parts - front and rear.
The front is an irregularly shaped plastic ring with a hatch and a rubber cuff in the middle.
The back consists of a drum with a drive mechanism, which we will remove. To do this, turn this part upside down and begin to disassemble the shaft.- Be careful with the screw in the middle. In order to unscrew it, you need to attach a metal rod on which you need to hit with a hammer. After these steps, the screw can be unscrewed with a screwdriver.
- Now it's the shaft's turn. It is removed using 3 wooden blocks (1 small and 2 large). A tank is placed on large bars and a small bar is hit with a hammer, which is installed on the rod. Despite the fact that the stem looks strong, the blows must be of a certain strength - weak, stronger and even stronger, so as not to damage the part. As a result, the drum should separate from the tank.
- It is possible not to dismantle the bearings if there is no problem with them. Perhaps a damaged tank is to blame.
- But often bearings or seals still have to be changed, then you need a metal rod, with which light blows are applied with a hammer along the edges of the part. In no case is it recommended to knock on one edge in order to avoid drilling out the part. Both bearings must be replaced if they are defective.
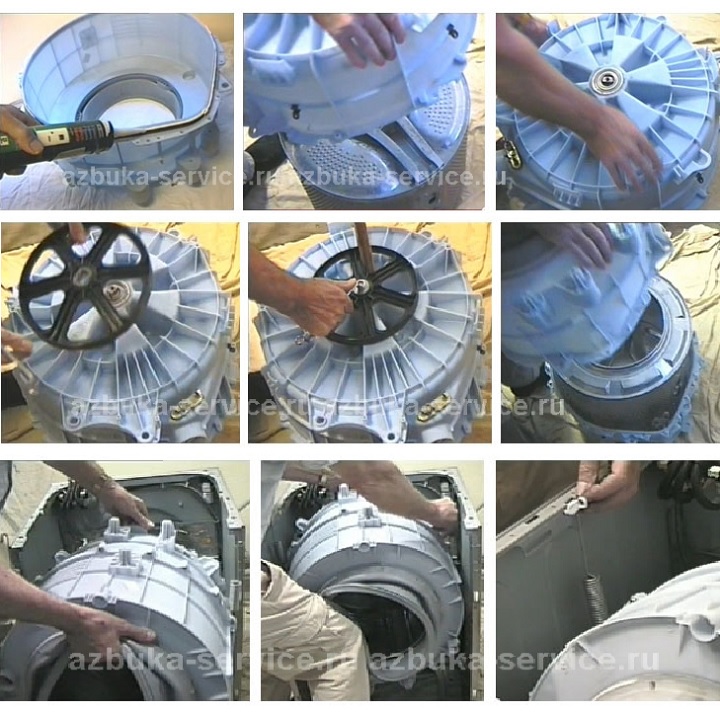
After the work has been done, the washing machine is assembled in the reverse order.
Assembly
 How to glue the washing machine tank after repair?
The sawn parts of the tank are lubricated with sealant and connected.
You can use cold welding.
Bolts are inserted into the drilled holes and fixed with nuts.
The size of the bolts will depend on what diameter you drilled the holes.
What to do if the tank body is deformed?
First of all, you need to analyze the nature of the damage and the scale of the work.
If the tank is plastic
 If the tank is plastic, cracks may have formed on it and they are the cause of water leakage.
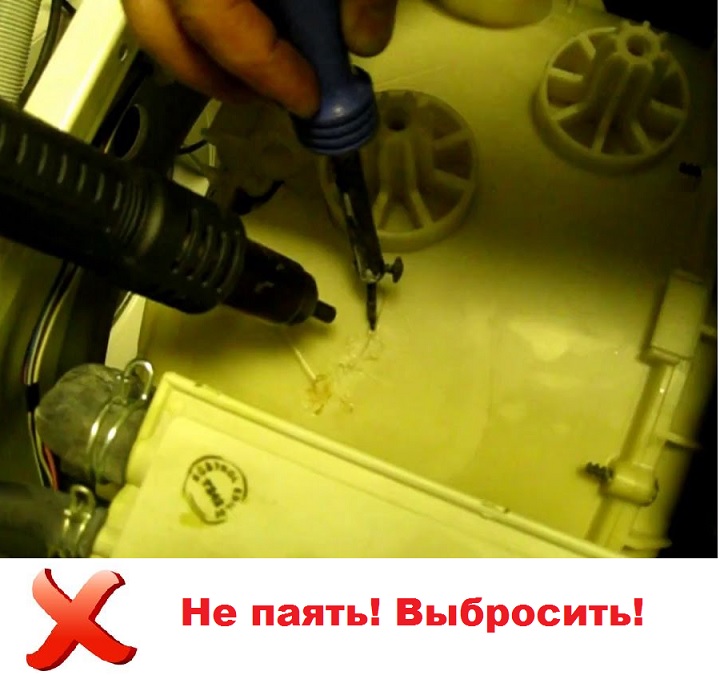
We immediately dismiss the option with crack adhesion, because this is a conditional repair of washing tanks, which will not last long.
The best option is to replace with a new tank. The price of a metal tank is more expensive than a plastic one.
If the tank is stainless steel
If we consider the possibility of repairing a stainless steel tank, then the option using welding is quite justified here. Of course, it is better to trust an experienced welder who will do everything neatly and quickly. After welding, you can paint over the seam with waterproof enamel to increase the life of the part.
Deformation repair
If the tank is deformed, the repair is as follows:
- You will need a hammer with a block of wood.If the damage is small without holes, no other tools are needed.
- The dent must be heated using, for example, a gas burner. The outside of the tank gets hot.
- It is not a dent but a bulge that strikes the bar with a hammer until the metal has cooled down.
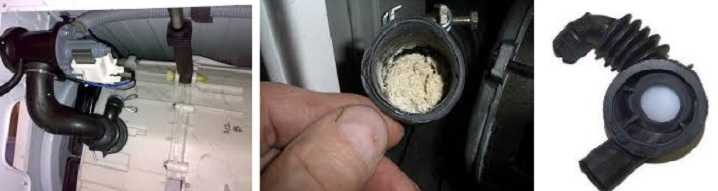
Drain repair
If there is a malfunction in the drain system, the action plan is as follows:
- Check the drain hole for blockage. You may need to remove the water stone, for this it is convenient to use sandpaper.
- The sealing gum and cuff also require a thorough inspection. It happens that the gum becomes oak and cracks, in this case there is only one way out - replacement with a new one.
- The drain valve has contacts, it would be nice to take a multimeter and check them, after thoroughly cleaning them first. If the resistance is equal to one, a replacement part will be required, because it is clearly defective.
Of course, repairing a washing machine tank with your own hands is not an easy task. Correctly disassembling, repairing, and most importantly, assembling an unmistakable unit at home is almost a feat!


You see html codes in the text, fix it
Thanks a lot, fixed!
Hello. I have an electrolux washing machine. The neck of the plastic tank is damaged, where the hose for water intake is inserted. A piece broke off from the neck and the hose pops out. I decided to buy a new one, but it's a pity to throw it away, it's still good. Maybe there is a way to fix the neck. I would put the old washing machine in the summer kitchen, and the new one in the house.