 A modern housewife cannot imagine life without her main housekeeper - a washing machine, so some unforeseen breaking will be corrected immediately with the help of some repair actions.
How to seal a hole in a washing machine rubber band
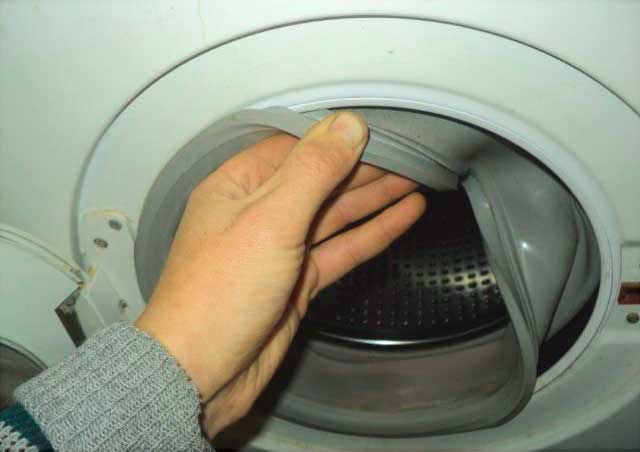 Quite often there are situations when falls into disrepair not brushes in the tank or heating ten, a washing machine hatch cuff, which can not always be replaced in a short time.
This will not greatly affect the operation of the washing device itself, but it can ruin a comfortable life very easily, since there will always be water flow.
 That is why many users increasingly began to wonder "how to fix a cuff leak?" and is it possible to do it yourself, without contacting a service center.
Can be cuffed, but this is likely to work for a short time. These types of repairs can be carried out as a temporary measure until your washing machine is taken to service center, or until you raise money to repair your assistant.
What might cause this
You can understand and prevent this breakdown at the very beginning.When examining the structure, it will become clear whether it makes sense to repair the device at home and how to avoid such situations in the future. There can be several reasons that can cause such a breakdown.
 cracks, resulting from a very strong vibration drum of your washing machine. Of course, it is possible to make repairs, but this is just the tip of the iceberg. So that in the future such a problem does not bother you anymore, you should solve the issue with strong vibration, which is many times more difficult.
- Sometimes the problem lies in rubbing the cuff when something in the mechanism was broken, and the cuff began to rub against some part. Displacement can lead to such a breakdown. drum. Before starting the repair, you should fix the problem that caused this type of damage.
- Cuts or breaks which, as a rule, are formed due to coins forgotten in the pockets of things.
- «Lethal" damagewhich make no sense to repair.

Preliminary preparation and inspection
 If you nevertheless decided to glue the cuff in the washing machine with your own hands (for example, at the moment you don’t have the money to buy a new part, or there are no options suitable for replacement, and you really need to wash), then you need to take a number of measures to prepare for repair.
They can help you avoid various troubles in the future.
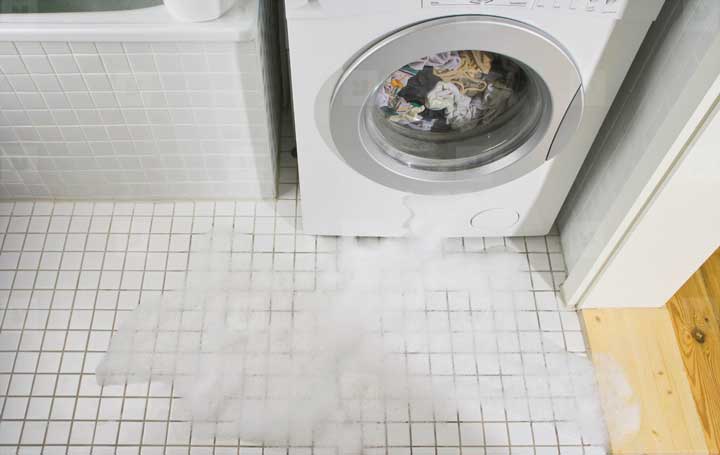
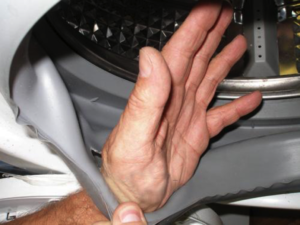
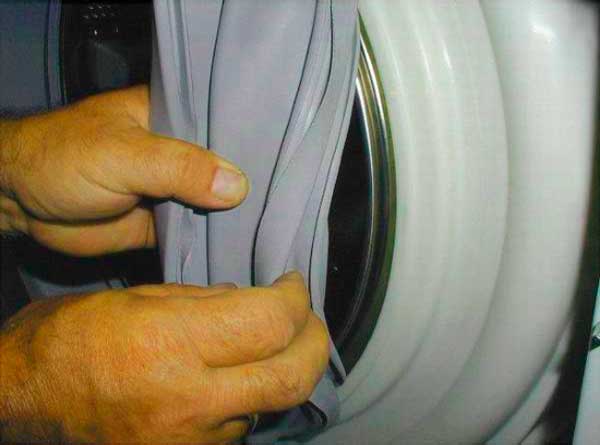
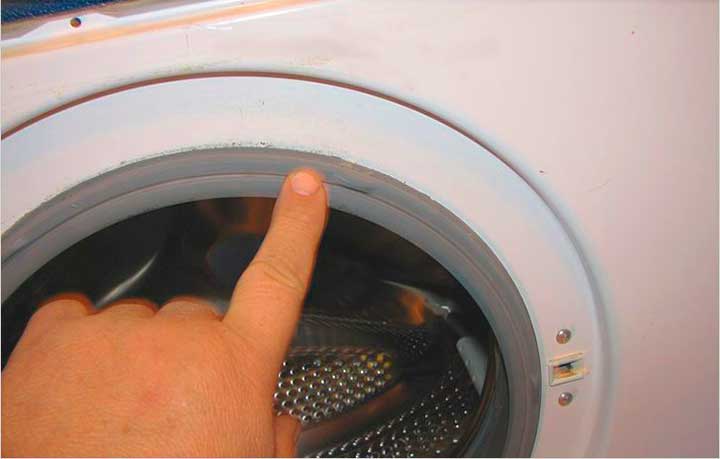
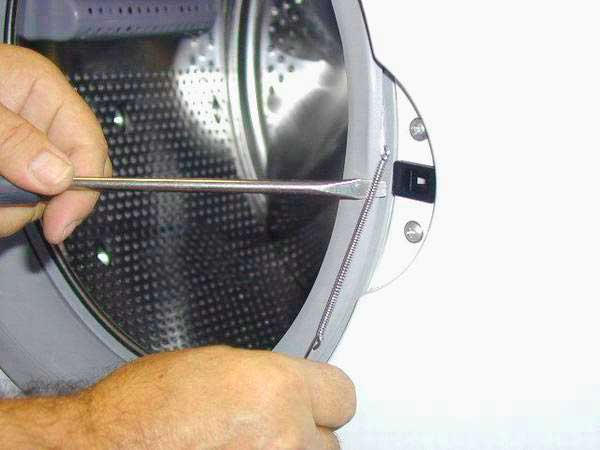 So, first you should carefully inspect the cuff and determine the percentage of the feasibility of its repairas well as the cause and extent of the damage. For this you will need remove spring clipholding the cuff itself. In some models of washing structures, you will need remove the front cover completely, and in some cases even remove the drum.
 Then you should execute analysis for the need to dismantle the cuff. If the damage is in the access zone and is located on top, then it can be sealed, and even without removing it. In some models, in order to remove the cuff, you will also need to dismantle the drum, so try to soberly assess your strength in terms of reassembly in advance. It may be better for you to turn to a specialist or just an experienced person.
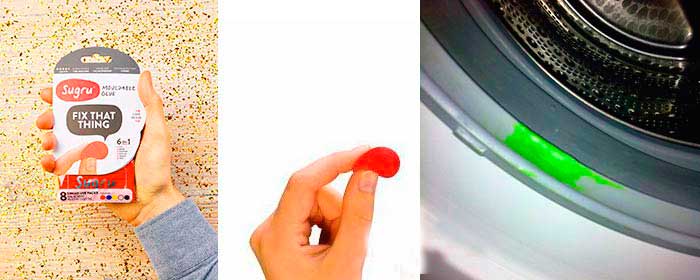 Finally, we approach the patch and glue. If you don't have a thin rubber band under your arms, then you can use a condom or a medical glove, which will need to be folded in several layers. The glue with which you will repair the cuff must have high adhesion and elasticity.
Repair process
For quick and high-quality repairs, you should prepare and lay out in advance all the tools and fixtures that you may need at the most crucial moment.:
- Thin rubber.
- Scissors.
- Alcohol/gasoline for degreasing.
- Glue "Moment".
- A soft cloth that you no longer need or cotton wool.
In order for the washing machine to serve you as long as possible after such a repair without unexpected surprises, adhere to the following action algorithm.
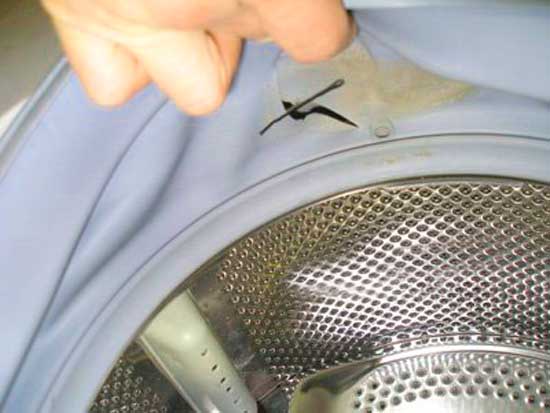
- Prepare your patch first. If rubber acts as it, then you should carefully cut it to the size of the patch. If you will use a condom or medical gloves as a patch, first glue each layer, and then just cut the part to the desired size. The patch itself should be about 2 cm larger than the hole on all sides.
- In place with a hole in the cuff of the hatch of the washing machine, swipe degreasing with gasoline or alcohol. The cuff with the glued patch should be unfolded until completely dry.
- Further Apply a thin layer of adhesive to the surfaces to be bonded. Follow the instructions that come with the adhesive for the following steps. There may be two options. You will either need to connect the parts immediately, or wait a while until the glue “grabs” and then glue.
- For the bonded surface, provide the most natural position, and then fix until the glue dries.
- leave detail to dry for a day. During this time, the washing machine cannot be used.
And that's it, consider that the home repair of the cuff of the washing machine is over. But do not be sure that no more problems will arise.
 After the glue has completely dried, you can start assembling. When the installation of parts in place is completed, perform a test wash to check the effectiveness of your own repair. If you did everything right, there should be no problems and for some time your washing machine will work without any leaks.